Step 1 - IMFN, Copy IDPS#
In order to set up approvals, the IDPS screen MUST be copied. Use the IMFN screen to copy IDPS and make the following changes.- Use the “Copy Function and Form” to make a copy of IDPS. The system will default IDPS_EXT as the name of the function, however this can be over written to suit the users preference (For example: IDPSA, IDPS_APPROVAL, etc.). The description can also be edited.
- The Usage of the new function must remain as User Defined so that it is not overwritten with the next release of the application.
Step 2 - IMFN, Add Security#
Once the new function has been created add, as a minimum, the P2K_MASTER role on the execution rights tab.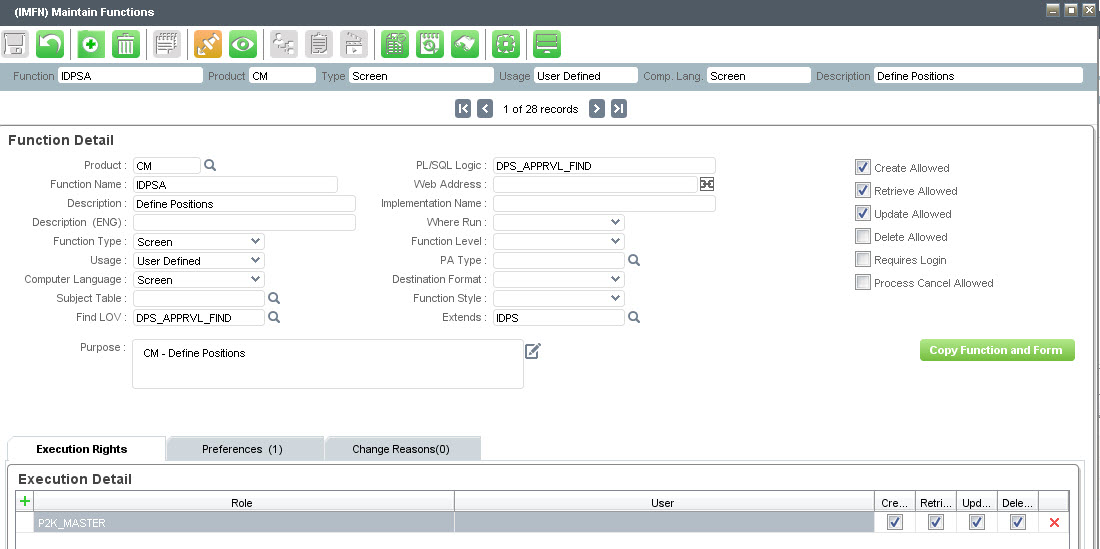 |
Step 3 - IMFN, Add Approval Preference#
On the Preferences Tab the function preference “DPS_APPRVL_REQ(System_Preference)” will need to be set to “True”. This will result in approvals being tied to the new extended function. In order for the preference to be respected, you must log out and back in again. |
Step 4 - IMFOS, Add Object Security#
Once the newly created function is in place, object security should be used to restrict all fields that will not require approvals. Object security for a form can be done in the IMFOS screen.It is suggested to secure off the “standing” column on the extended IDPS form to avoid the value from being manually changed. You will not be able to select “Waiting for Approval” or “Not Approved” on the original IDPS screen this can only be changed on the extended IDPS screen.
Step 5 - IDAP, Define Approval Process#
On IDAP, the approvers and approval steps must be defined. By selecting ‘Positions’ in the Type field, the new approval process will be tied to the newly created function. |
Step 6 - IMLOVL, Define New Find Block#
The original IDPS will not display any positions that are in a status of “Waiting for Approval”.A new find block LOV with a where clause changed to include positions waiting approval will need to be added to the new extended form. (In this example, the where clause has been removed and all the status types are included on the extended form).
 |
Step 7 - IMFN, Add Find Block to New IDPS Function#
Once the new find has been created it will need to be attached to the newly created function on the IMFN screen. |
